

How to Autumn at dinner Onion Skin Dyed Easter Eggs
How to Autumn at dinner Onion Skin Dyed Easter Eggs Delicious, fresh and tasty.
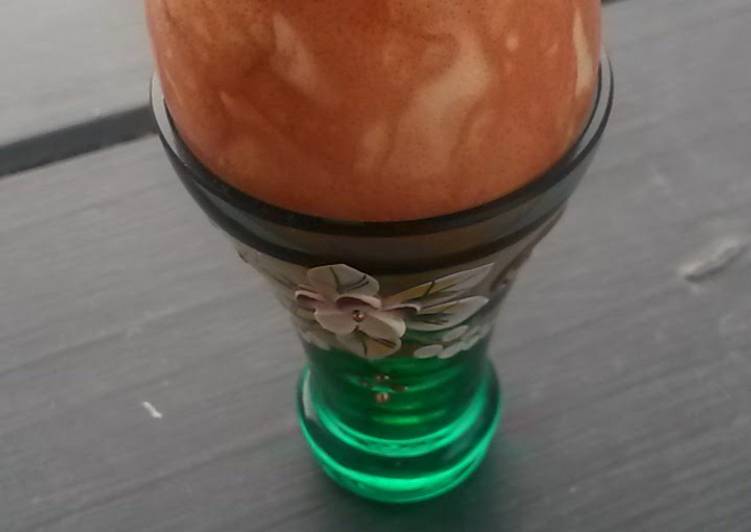
Onion Skin Dyed Easter Eggs. Easter Eggs Dyed With Onion Skins: Boiling eggs that have been wrapped snugly in onion skins, produces beautifully patterned Easter eggs. I never really cared for the usual colourful Easter eggs most people make. They're too gaudy for my taste.
The old-fashioned way to dye Easter eggs naturally without any chemical colorings.
A safe and stress-free way to dye eggs with onion skins.
This recipe will show you how to do it by simply boil them in an onion skin, and vinegar, water solution.
You can have Onion Skin Dyed Easter Eggs using 7 ingredients and 10 steps. Here is how you cook it.
Ingredients of Onion Skin Dyed Easter Eggs
-
It’s 12 of eggs.
-
You need 3 tbsp of white vinegar.
-
It’s of water.
-
Prepare of red or yellow onion skins.
-
You need of cheese cloth.
-
It’s of culinary twine or twist ties.
-
It’s of oil.
The beauty of homemade Easter Eggs with onion skins wrapped in nylon stockings.(<-amazon) I can't even think of a better organic egg color than this.
Beautiful, cool and healthy, onion skin dye takes the cake.
Since this is an organic wholesome food blog, I can't just let you use that egg dye kit from the drug store.
After onion skin brew cooled off, you have two choices: discard the skins and cook eggs just in onion dye or leave skins in the pot during egg cooking.
Onion Skin Dyed Easter Eggs instructions
-
Collect onion skins by saving them up or going to the grocery store & loading up you bag of onions with loose ones you find at the bottom of the display bin. Larger, deeper colored skins are more desirable. But you can mush the bits together if they break..
-
In a large bowl or pot filled with lukewarm water soak the onion skins for 10 mins..
-
While skins soak, fill a large pot with water & the vinegar, bring to a boil..
-
Sit your eggs in the skin soaking water with the skins..
-
Cut the cheese cloth into squares large enough to surround an egg. Youll need 12. Check your measurement before you go to the next step. You'll need enough to tie the top together & keep the skins on the eggs..
-
Take eggs out of the soaking water one at a time. Cover with a layer ot two of skins, then tie up the whole thing in the cheese cloth. Secure with twine or twist ties. Repeat for all eggs..
-
When the water & vinegar are boiling, add the eggs parcels gently into the water. Boil for 10 to 15 minutes. Then carefully pour off the hot water & run cold water over the eggs until cooled..
-
Remove the cheese cloth & onion skins, which can now be discarded. Pat dry the eggs. Alow some time to rest..
-
With a small amount of oil on a paper towel you can shine the eggs up for Easter displays or egg hunts!.
-
Red & yellow onion skins produce nearly identical coloration. The right half dozen here were cooked in isolation using red skins & the left six using yellow skins. Red produces slightly deeper hues, but not enough for any real difference in my opinion..
I like to leave the skins in the pot and place the eggs on the top of the skins to prevent them from cracking and to give the eggs a nice "marble" effect.
Cover onion skins with water and bring to a boil.
Easter is around the corner, so I'm sharing my grandmother's recipe of the most beautiful, cheap, easy and natural egg dye: onion skins.
I t gives an amazing range of various shades of red and brown, while keeping the egg white naturally white underneath.
And don't worry, your eggs won't taste like onion.